Storage & Boxes
Rivian Customizable Console Organizer
SKU 3DPW-pr-1097273
$76.00NZD
In stock · Made-to-order resin · Ships from Auckland · Free shipping over $75
- Material
- High-Detail Resin (8K)
- Colour
- Grey
- Weight
- ~40 g
- Print time
- ~4.5 h
- Shipping
- $10 std · $20 express
- Lead time
- 1-3 d print + 1-4 d ship
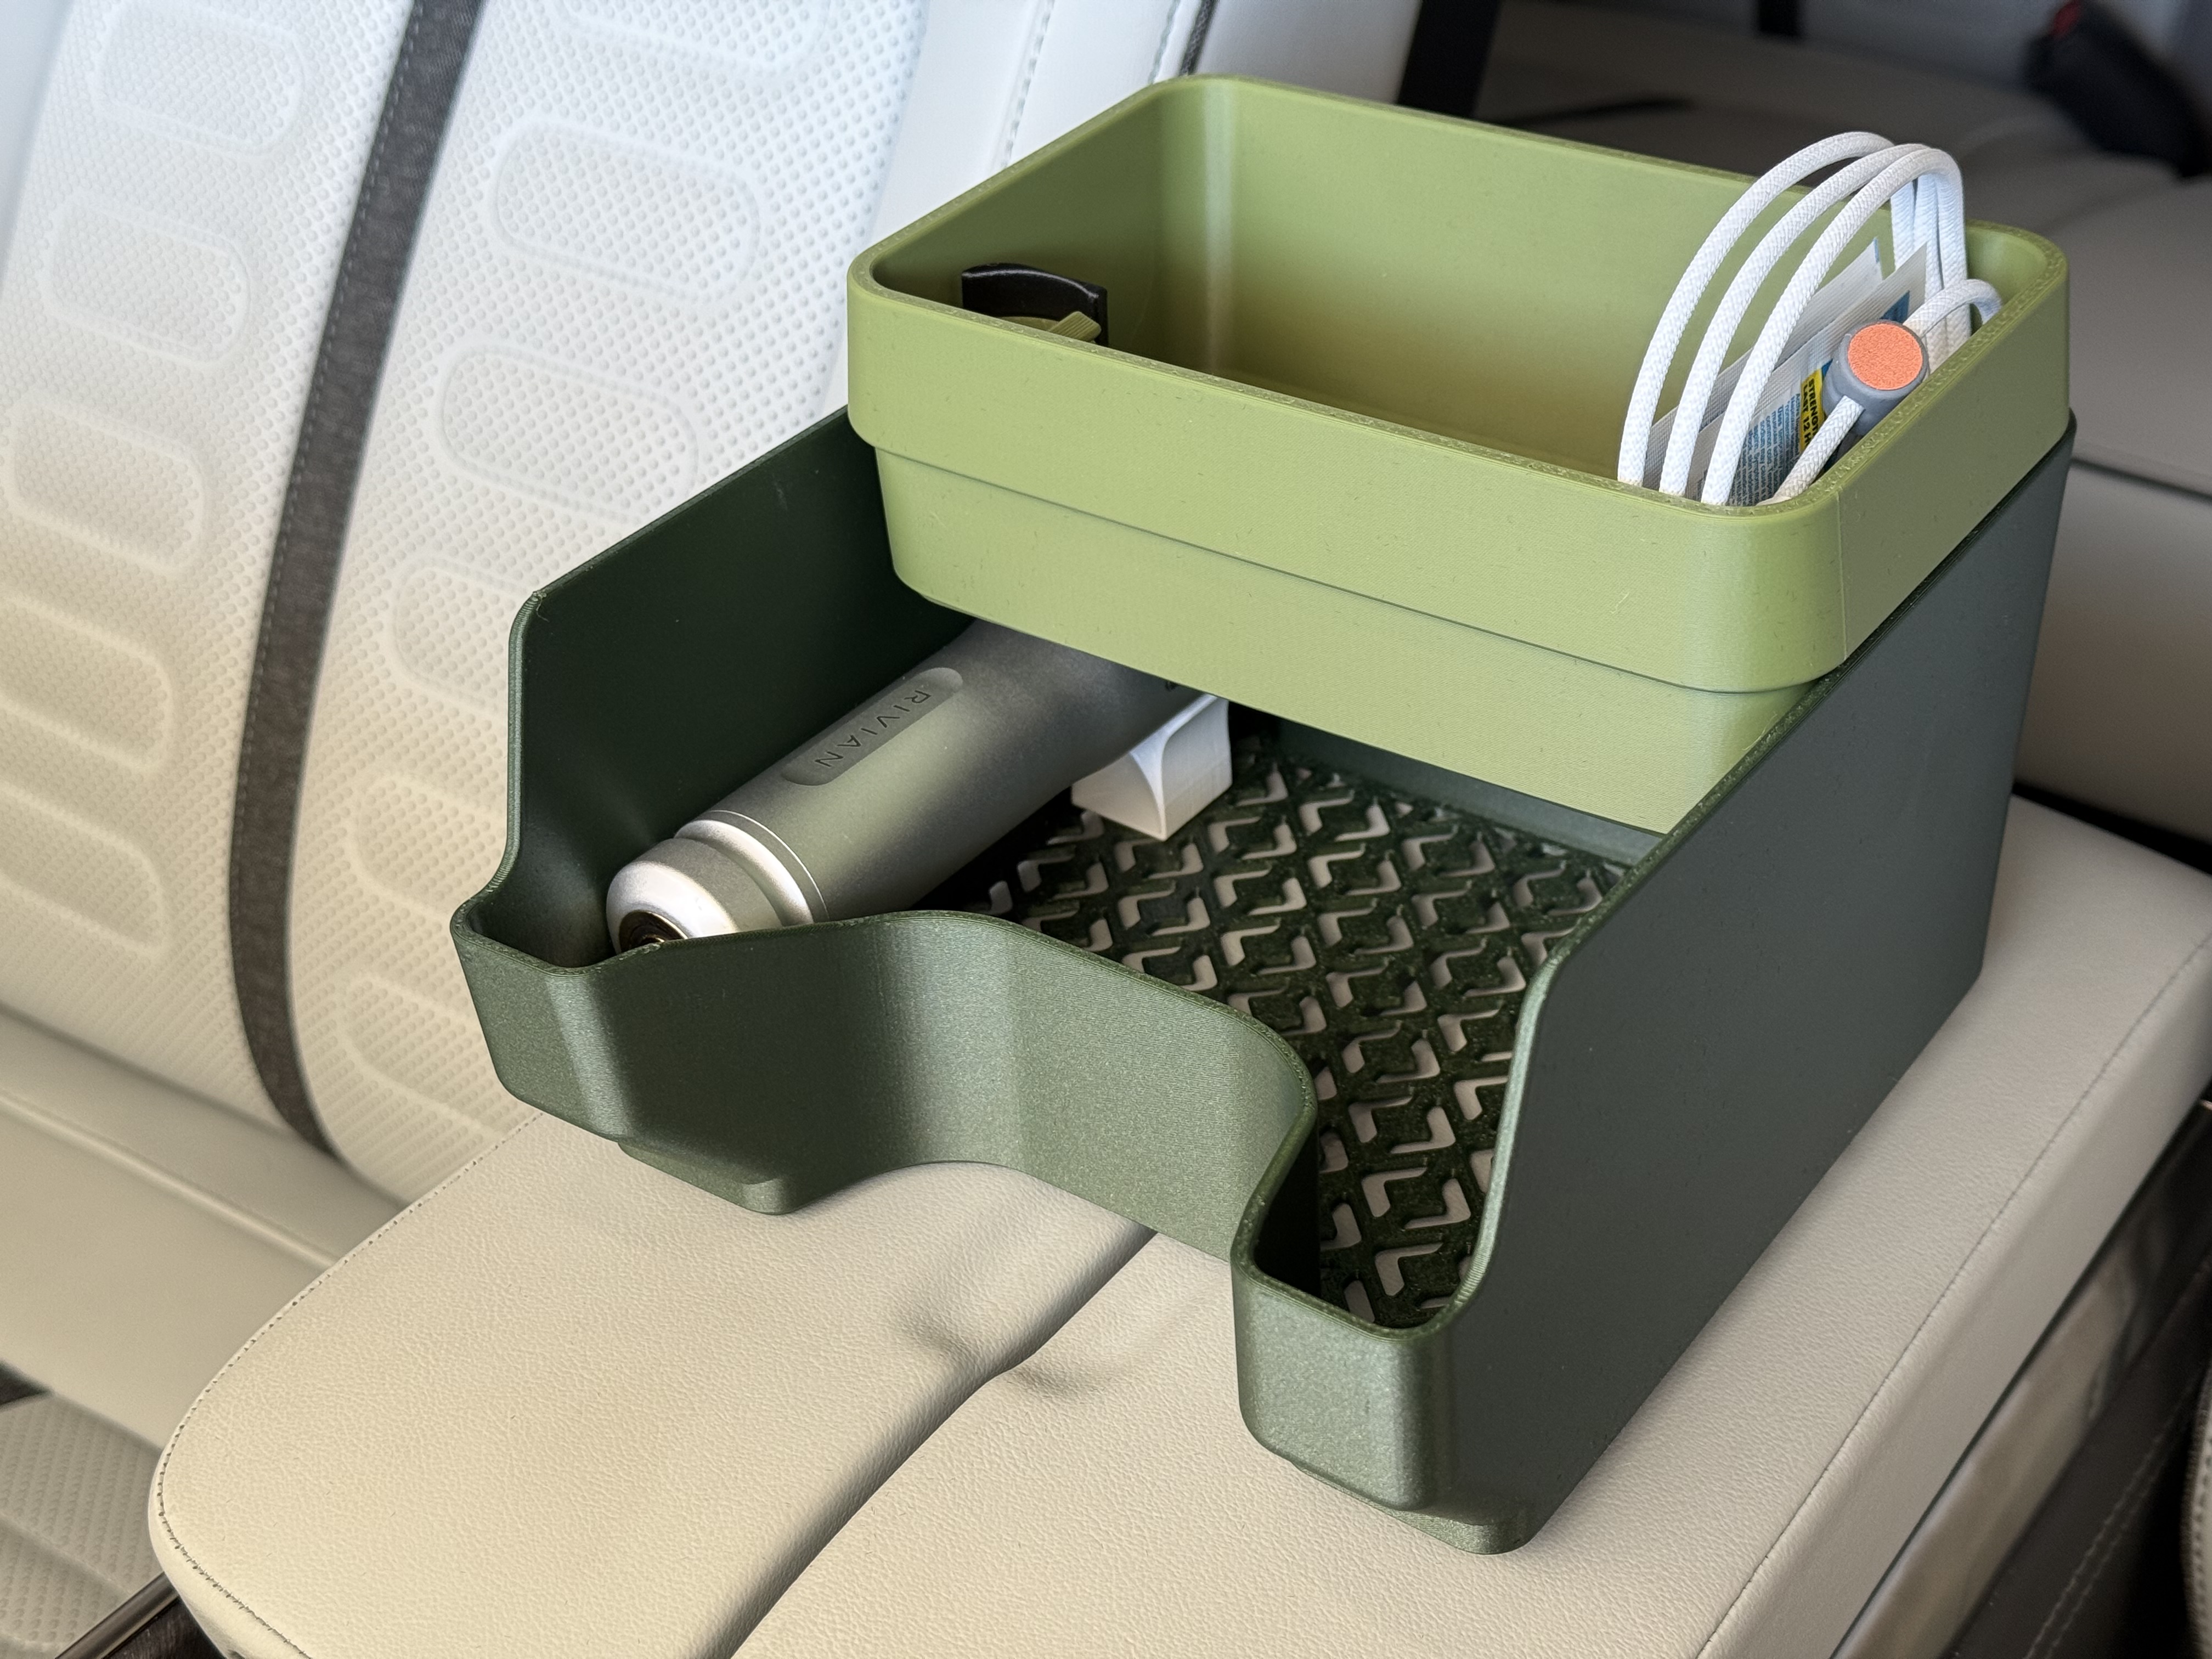
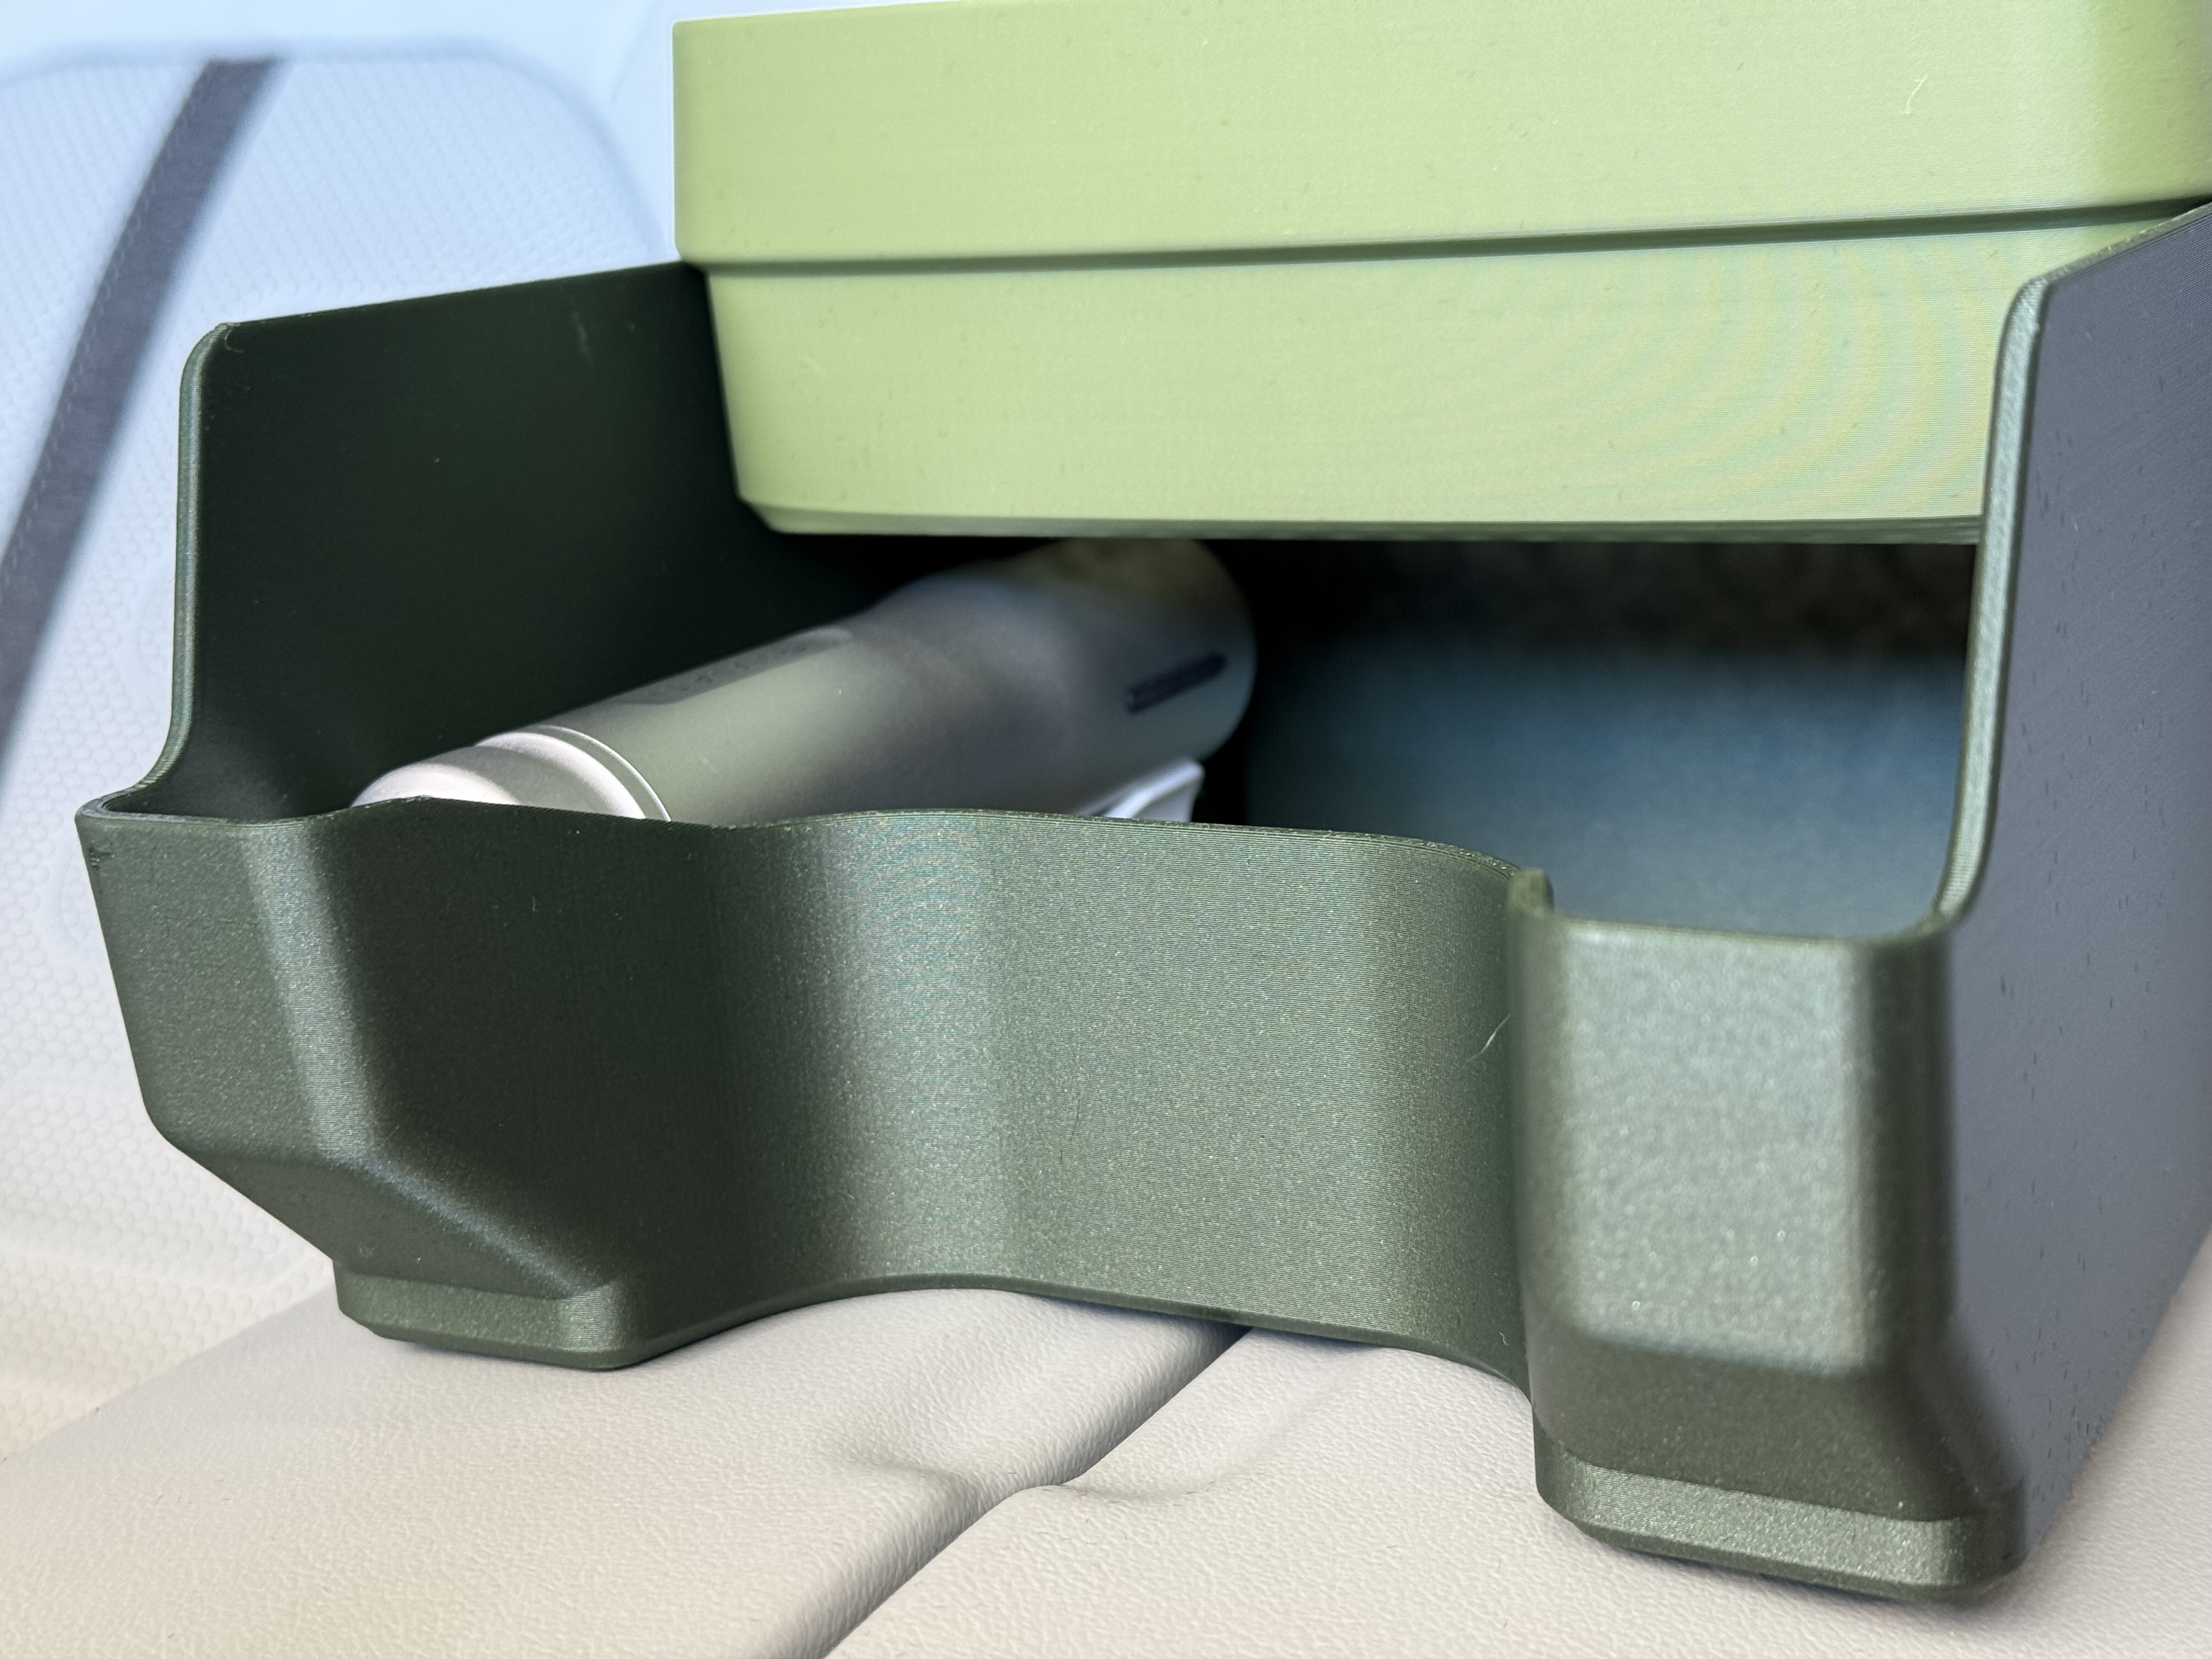
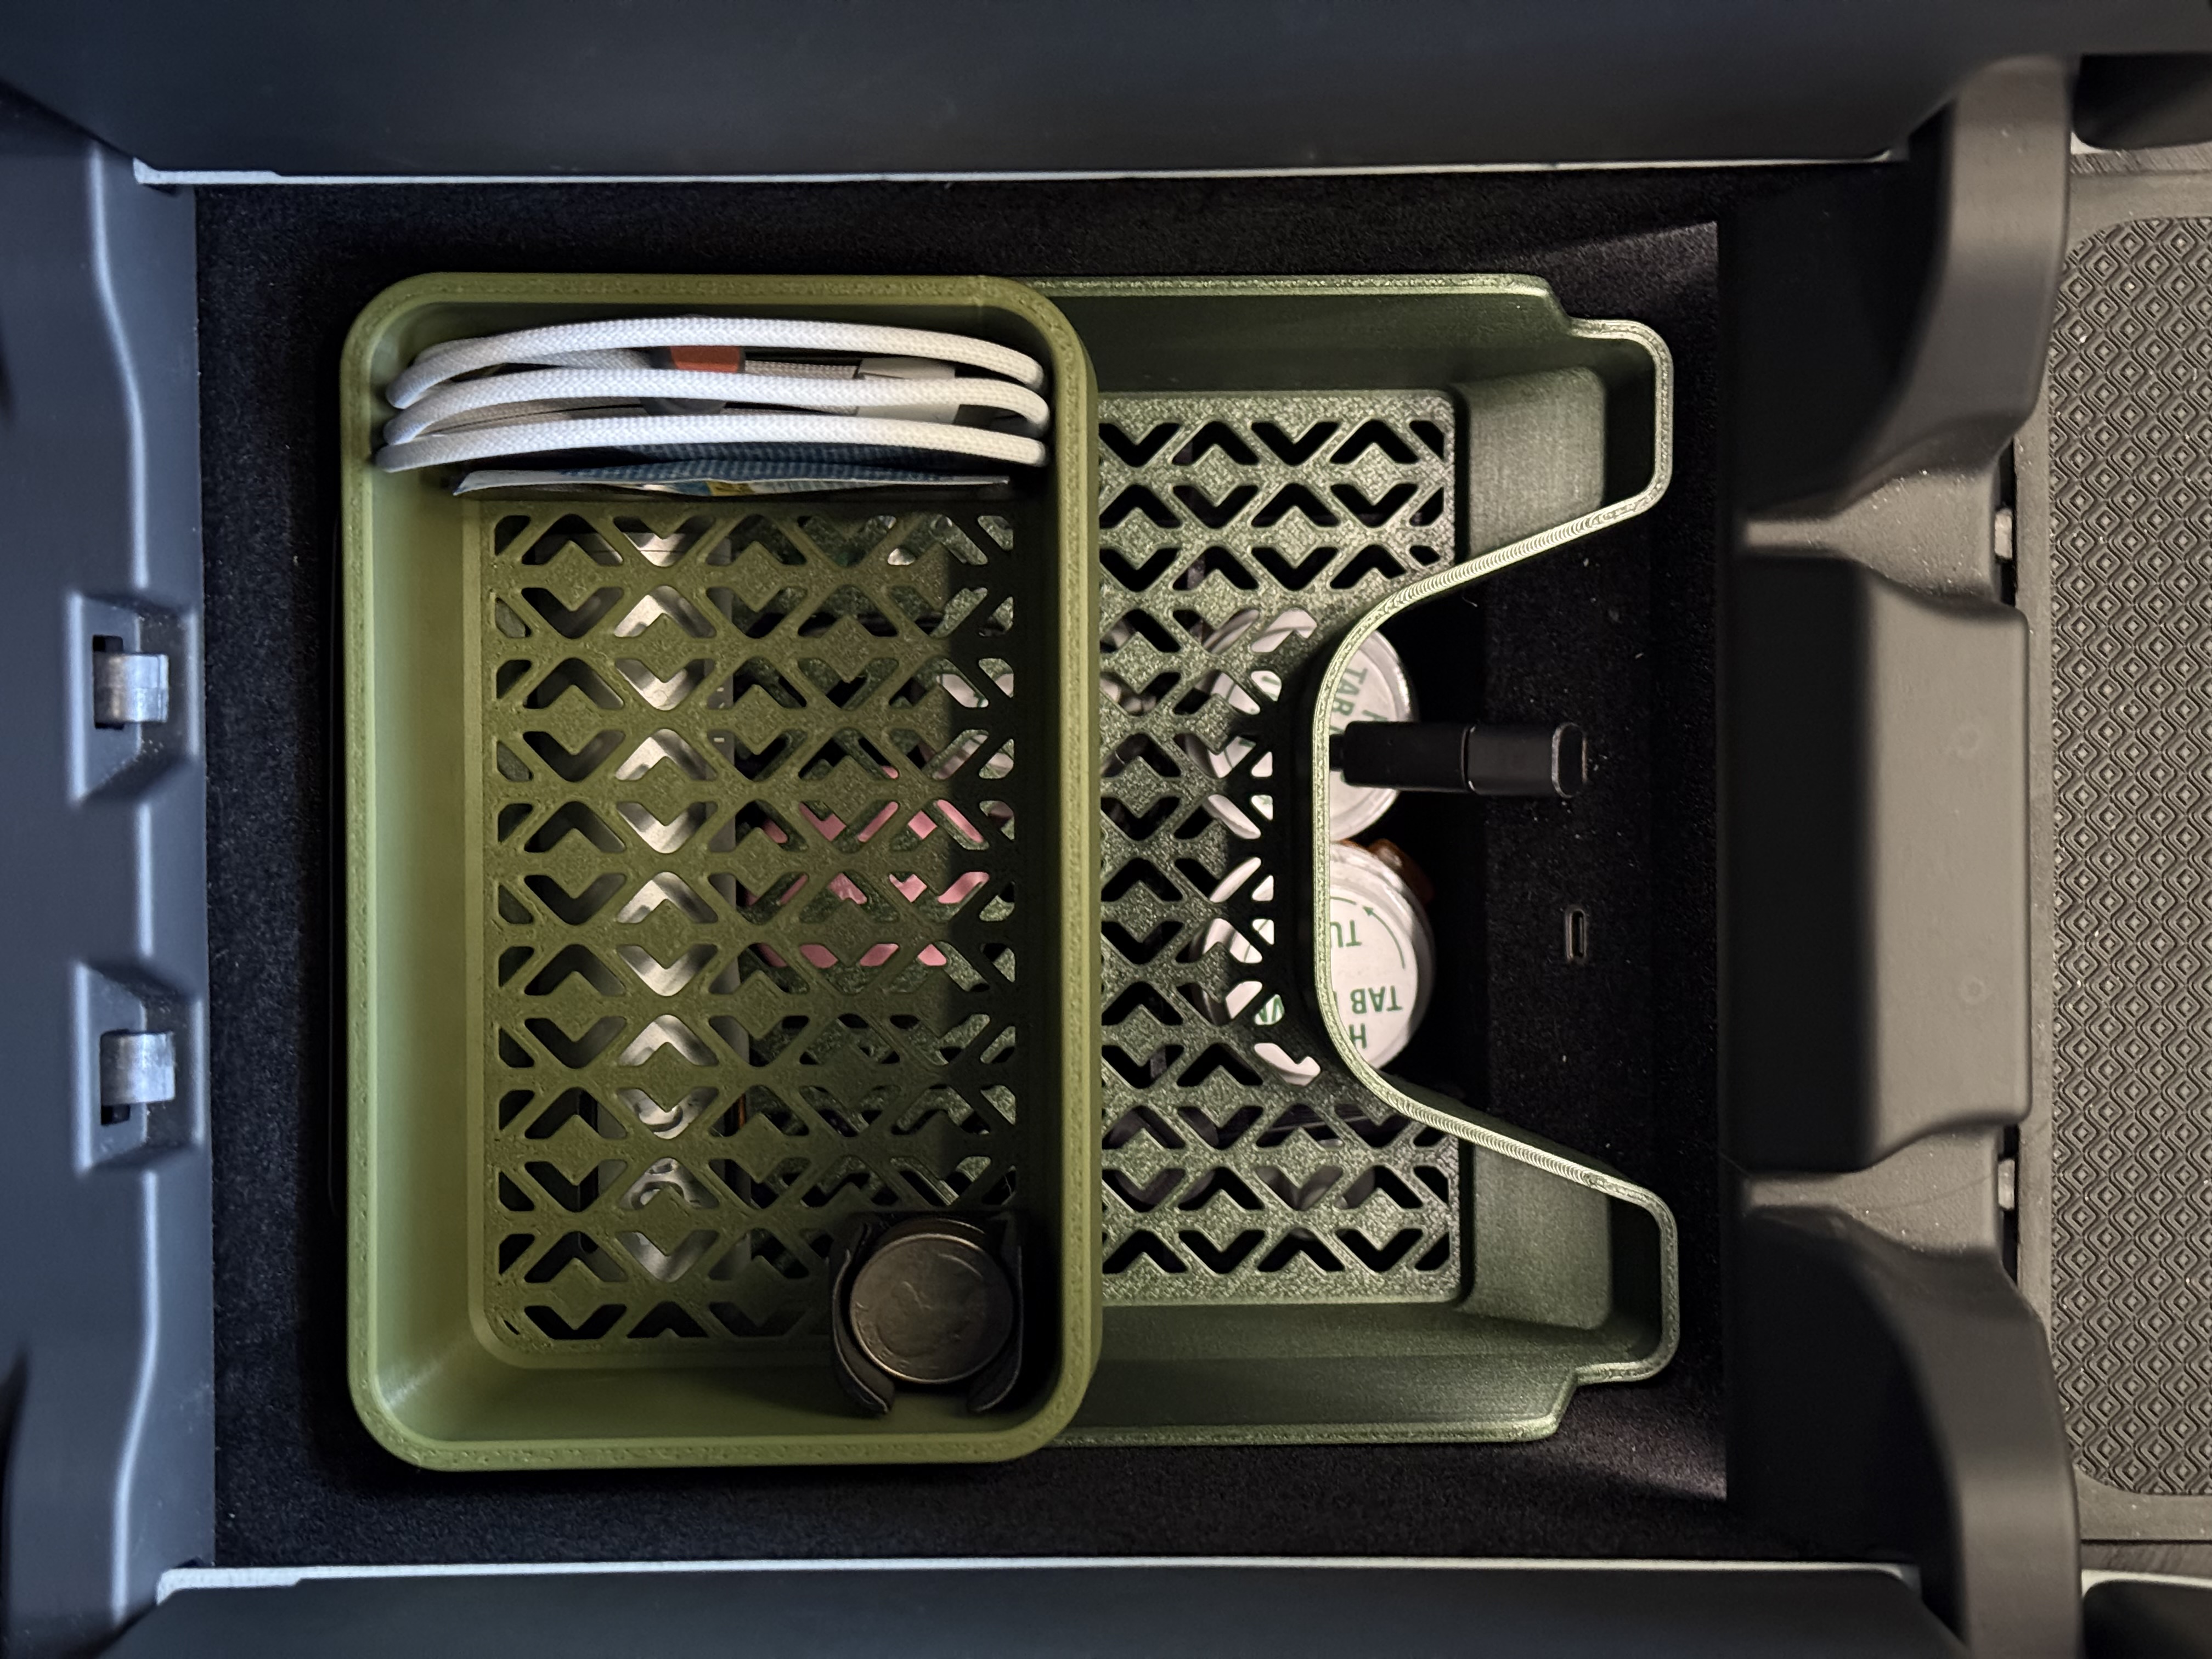
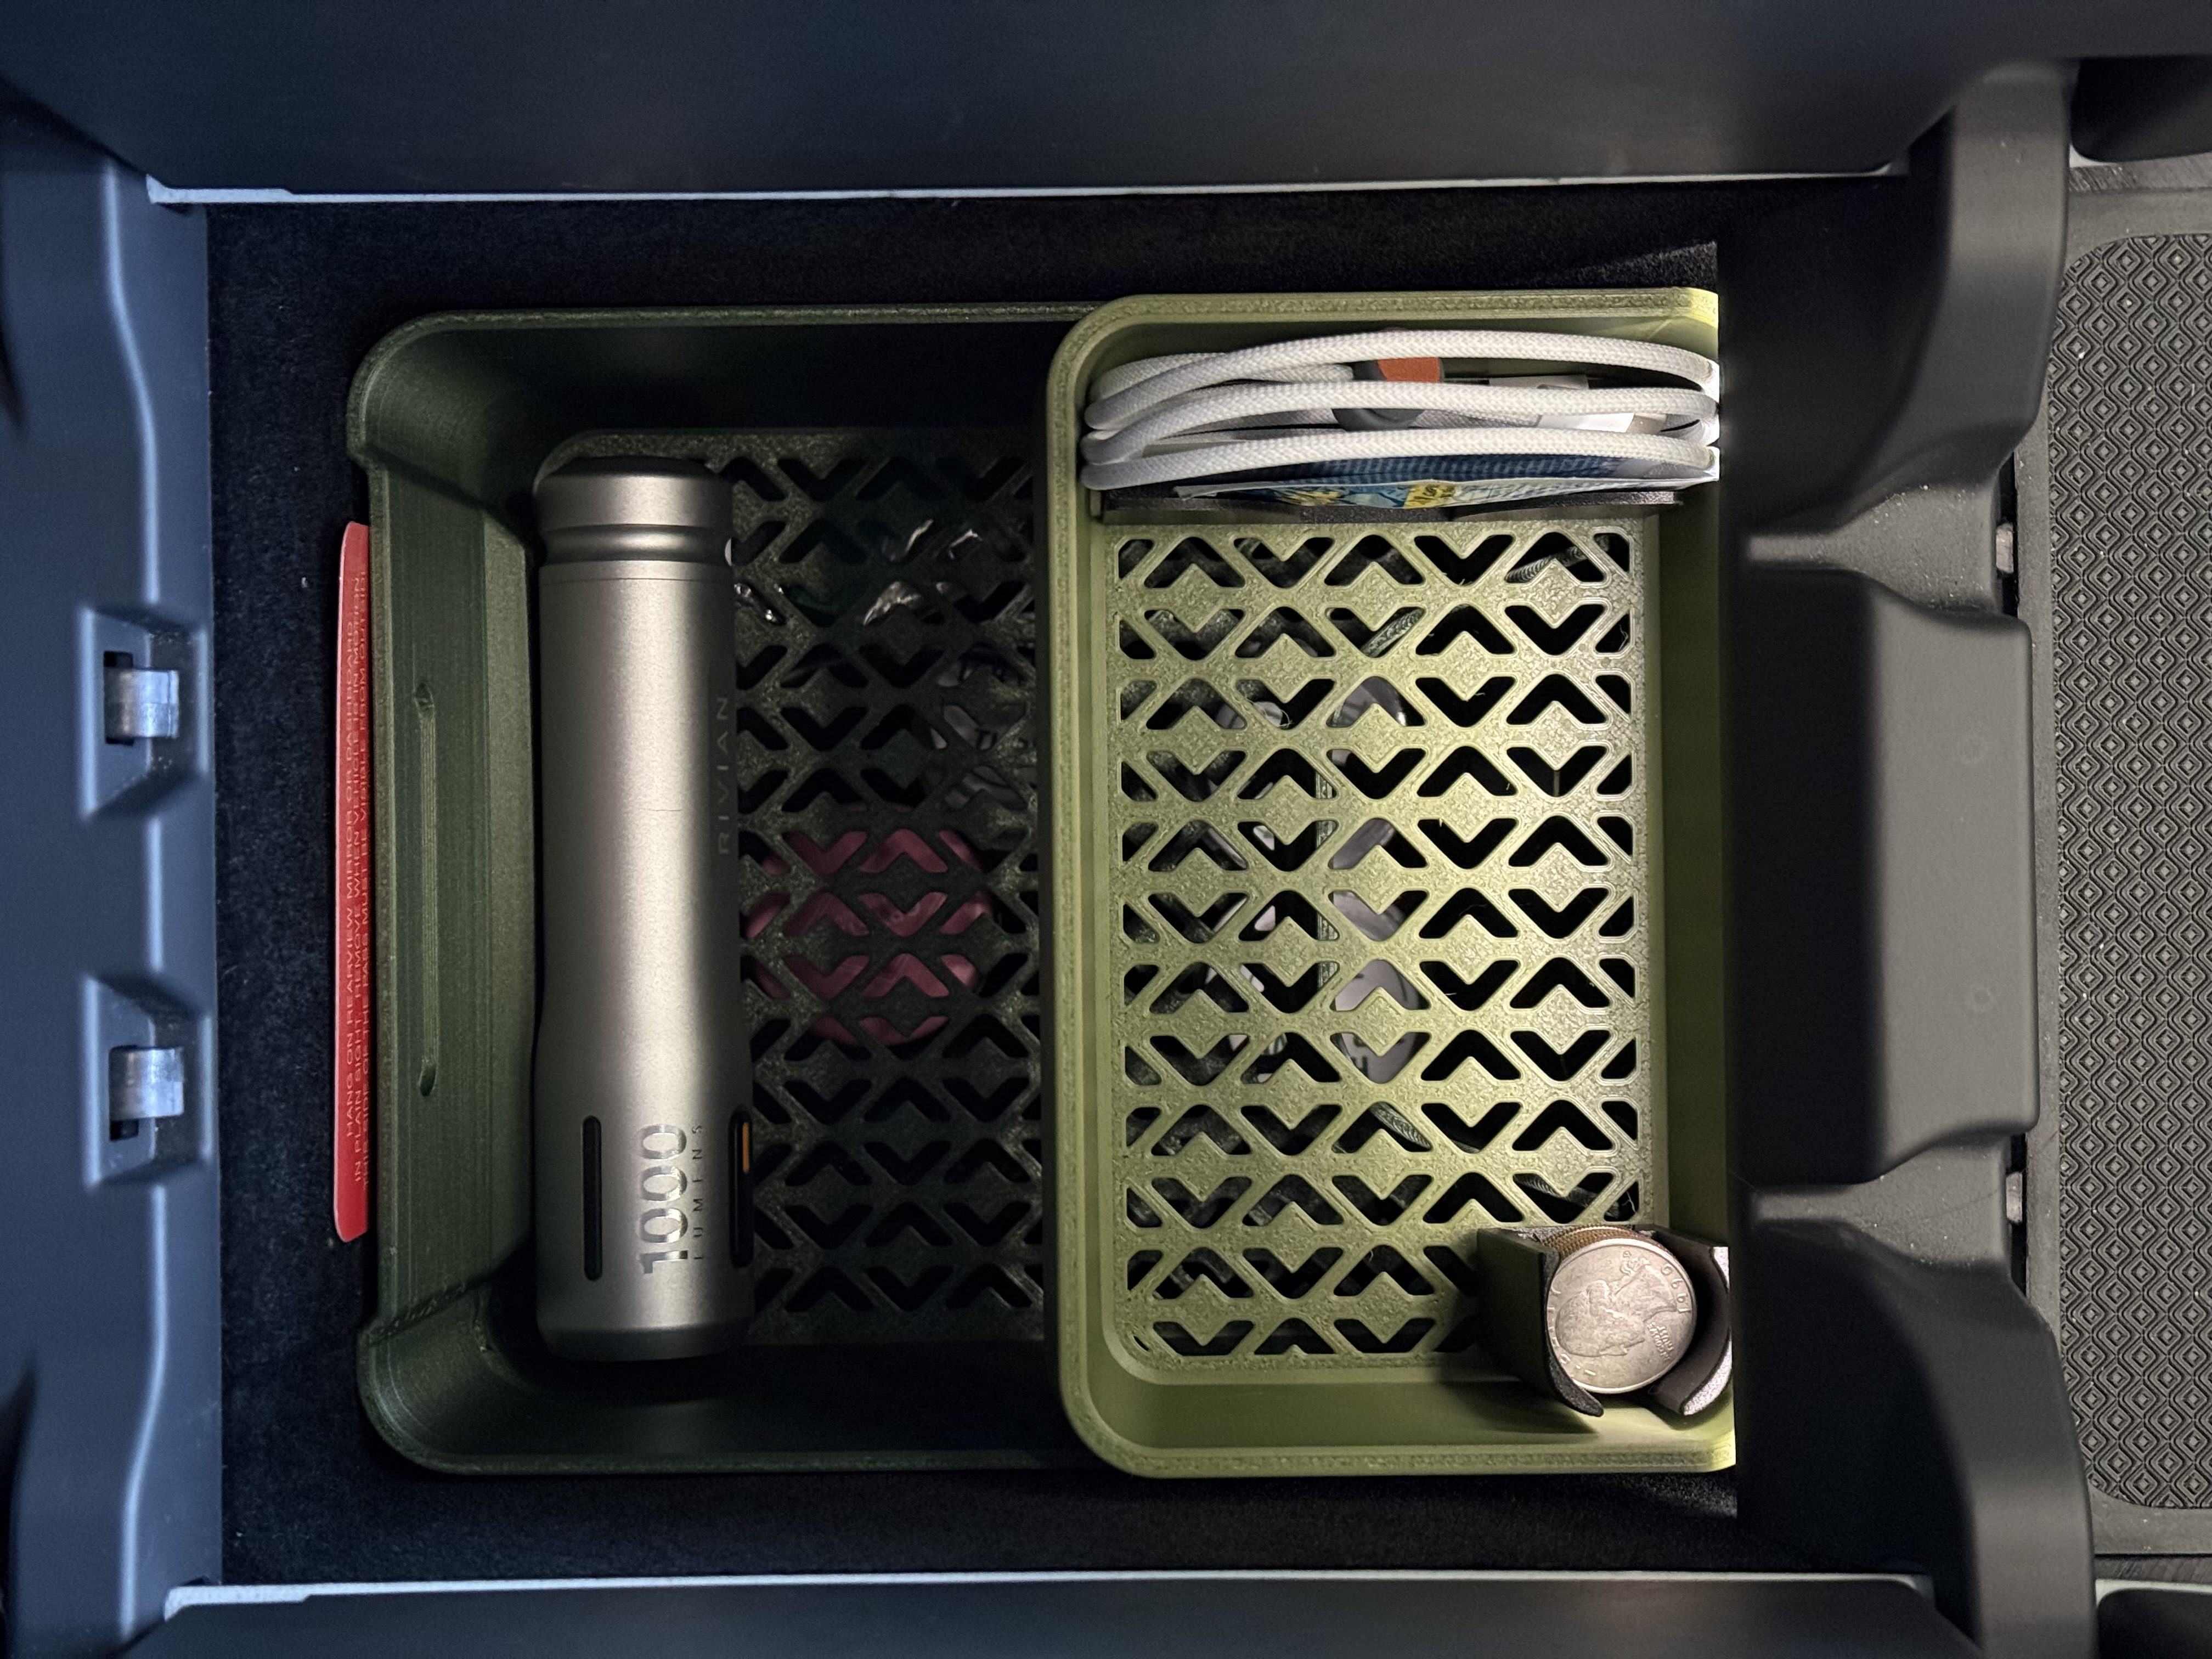
🎁 Get $100(s) in Rivian Rewards points and 3 months free RAN charging by using my referral code TODD11893313 when 🛒 ordering a Rivian. UPDATESDec 15, 2024Revised clip feet design to support new “lock” mechanism. The lock snaps in from below.The lock is NOT compatible with the old feet. You'll need to print new accessories with the updated feet to be able to use the lock.The new feet have a tighter fit. They're a bit harder to attach, but hold better even without the lock.See Rivian Forums post for testing video.Rounded the point on the inside of the chevron to be less pointy. Because of the chamfer, the first layer would print with a sharp angle. This was causing a “sharp” edge on the surface layers. Now it should feel less sharp.This only affects the surface feel. It does not affect the function of the clips. See Rivian Forums post for more details. Overview💬 Discuss this model on Rivian Forums I liked the look of the OEM Rivian console organizer, but it was out of stock before I could order one. I then took to modeling up a replica in the meantime to print myself. As I started modeling, I noticed some things about the OEM one that I thought could be improved. I wanted the bottom to have holes to allow light to show what's below.I wanted it to be easily removableIt slides out without tipping – which the OEM one does as wellI added a notch to help grab it from the backI wanted it to be compatible with the safety manual (or any other docs using the built-in strap).I keep my California State Parks pass behind the safety manual and wanted that easily accessible.The top compartment can slide forward and tuck under where the led light is. The OEM one sits much higher.Standard credit card size items should fit in the top compartment with a divider.To keep the top compartment from sliding around, holes for magnets are included.The magnets should just press-fit into place.Use 6mm x 2mm magnets (this is the standard size from the gridfinity world, so figured they'd be widely accessible).I'd suggest starting with 1 magnet per side on the top bin and adjusting to your taste on how “strong” you want it.Personally, I'm using the 2 rear positions on the top compartment and then filling the front 2 and back 2 positions on the base. This lets it “lock” to the back and to the front, but still slide relatively freely between.An alternative approach to magnets is to just put a small strip of anti-slip rubber tape (like for rugs) under the arms of the top bin. It holds it in place well and doesn't make any noise. The OEM version uses a square rubber band around the perimeter tucked under the arms.AccessoriesThe chevron pattern is used as an attachment point for optional accessories. Note: The pattern has 22mm spacing on X axis (driver/passenger) and 28mm spacing on Y axis (front/back). DividersStands 30mm tall22x3 covers 3 mount positions in X axis direction22x4 covers 4 mount positions in X axis direction28x3 fits great in top. This is what holds the white cable in the photos.Flashlight/torch/hand warmertorch-notch holds the rear of the torch/warmer in place using the notch.torch-notch-offset moves the notch 11mm to the side, which helps when used in the top bin. See photo.torch-rear is meant for the rear/narrow side of torch/warmer. It's the torch-notch without the notch.torch-head is meant for front/fat side of torch. This is slightly shorter than torch-rear to let the torch sit perfectly flat for the OCD folks out there, like me.Coins26mm diameter for up to US quarter and up to 2 € (euro).Angled to help keep them in place and easily grip stack from bottom.Coin ClipThis is a simple clip designed to hold 6 US quarters or any combination of other coins around this thickness (~10mm)Use the clamped coins as a weight for the other coins to prevent them from rattling.KeysV1 has 4 slots to hold small/normal keys. Some keys may fit loose.V2 has 3 slots that should fit any size key and adds a pressure plate inside to help hold the key in place.Clip LockAdded Dec 15, 2024All accessory models have been updated to support a new clip lock.You'll need to re-print any accessories to get the updated clip design to use the clip.It snaps onto the clip from the underside to help lock it in place. This is especially useful on the key accessory as it holds large house keys rather tight. Additionally, the more clips are reattached the looser they get. This is probably going to be helpful for other clips that have just a single attachment point.💡 If you have an idea for an additional accessory, just let me know! RemixesI've added STEP files for all of the models to allow folks an easier time remixing to suit your own needs. I've also included an empty-base-1.step that's just the clips on a simple 21.5x21.5mm square base. This is what I normally start all of my accessories with. The mount points are 22mm apart minimum, so this size lets different attachments sit right next to each other. I've also included a few blank models (in the STEP folder) that are 30mm tall blocks with the corners chamfered a bit and the feet on them. The idea is that if you wanted to make your own accessory but don't necessarily know how to use 3d modeling software, you could use these directly in your slicer and then add negative volume modifiers to cut out whatever shape you need. If you use these, make sure you lay your finished models on their side once so the feet are printed horizontally for strength! If you do remix something, please post a make (or publish a remix) so we can see the cool thing you did! CompatibilityI believe this should be compatible with all R1 vehicles, as the OEM console organizer does not distinguish between R1S/R1T or Gen1/Gen2. I have a Gen1 R1S, so that's all I can verify. :) When installed, this sits 135mm above the floor. This means you have room for the NACS adapter under it (122mm) or even a box of Kleenex (Costco's are 129mm). PrintingSee the .3mf for all of my PrusaSlicer settings, but here's a recap: I use PETG, but ASA is also a good choice.0.4mm nozzle; 0.2mm layer height.0.2mm STRUCTURAL profile2 perimeters15% gyroid infillHilbert Curve top fill patternHelpful to hide scratchesI use on the base and top, but not important on the accessoriesI enable “single perimeter on top surfaces”Supports enabledOnly required for clips on accessoriesSet “overhang threshold” to 25 degrees to avoid excessive supports.I disabled supports on the base and top to prevent supports for the magnet holes.0.3mm elephant foot compensation (I find this more accurate than the 0.2mm default on my Prusa MK4)I painted seams to make sure they were in less visible areas.SupportIf you like my models and want to make my day, you can buy me a ☕!
Tags: organizer, console, rivian, resin print, nz made, made to order
Design credit: Original design by Todd Stansell - licensed under CC-BY.
View original model + STL files on Printables ↗
View original model + STL files on Printables ↗
Frequently asked
How long does shipping take?
Rivian Customizable Console Organizer is printed to order. Lead time is typically 1-3 business days plus 1-4 days NZ shipping. Standard NZ shipping is $10, free over $75.
What material is this printed in?
By default this is printed in High-Detail Resin (8K) at 0.025 mm layer height on an MSLA resin printer. Custom material and colour swaps are available, just leave a note at checkout.
Can I get this in a different colour?
Yes. Every product can be printed in any of the resin colours we stock, or hand-painted on request. Leave a note at checkout or email [email protected].
Do you ship outside of New Zealand?
Currently New Zealand only. Australian shipping is coming.
Who designed this?
Designed by an independent sculptor and licensed for commercial printing. The original is linked on this page.